How-To: Capture Xbox 360 Video Footage on an iMac
The most frequently asked question I’ve received over the past 9 months is, “How do you capture Xbox 360 footage on your iMac?” With 2-5 emails or Flickr messages coming in per week, I figured it was time to publish a How-To article. It’s really not an easy or obvious process, which is why it’s such a hot topic. But it’s not impossible or expensive. It’s simply a matter of knowing what you need to get the job done. While I’m using an Xbox 360, the same steps can be followed for any other console – including older generations.
Hardware Requirements
Before we get started, there are a few things you’ll need on top of your iMac and game console.
- Capture Device: Elgato EyeTV Hybrid.
- S-Video Cable/Adapter: Sold separately, an S-Video cable/adapter is available for all consoles.
- Composite to 1/8 Headphone Jack Adapter: Can be found at most electronic stores or easily online.
Setting up the Hardware
Assuming you have already installed and configured the EyeTV Hybrid.
- Connect the break-out cable that comes packaged with it.
- Connect the S-Video cable from your Xbox 360 to the S-Video input on the break-out cable.
- Connect the Composite to 1/8 Headphone Jack Adapter to the Composite audio cable (red and white).
- Plug the 1/8 Headphone Jack into the Line In port on the back of your iMac. Note: The newest EyeTV Hybrid’s break-out cable has both left and right channels directly on it. If yours does, plug the Xbox 360’s audio cables into those.
Configuring the EyeTV Software
While it’s not the greatest capturing software I’ve used, EyeTV is very simple to setup. Before we started, go ahead and turn on your console.
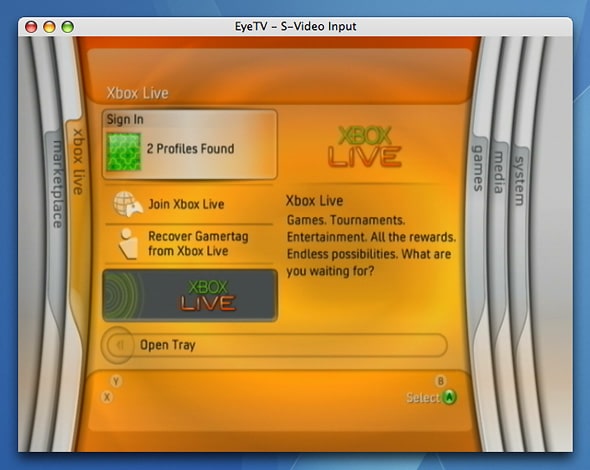
- From the Controls menu, select the S-Video input source at the bottom. You should now see the Xbox 360 dashboard in the EyeTV preview window.
- Open the Preferences window and go to the Display tab. Turn Overscan on and set the Deinterlace mode to Progress Scan.
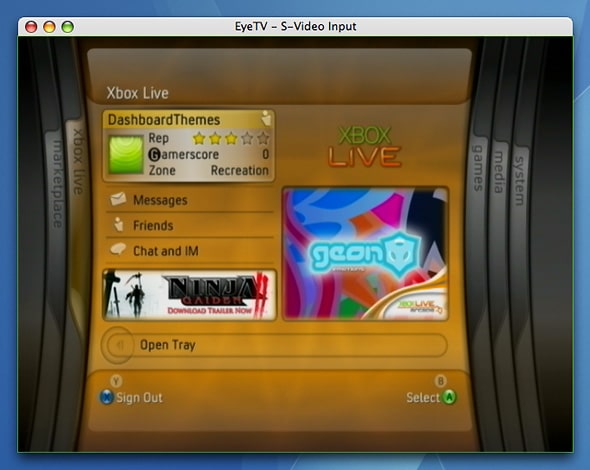
You should now see the Xbox 360 Dashboard in the preview window.

We’re not actually going to use EyeTV to record the video, so no need to bother with the recording preferences. The reason we’re not using EyeTV to record is quite simple – it can’t keep up. The product website used to boast that it could capture game console footage with “virtually no latency” (I’m paraphrasing here), but “virtually none” is not the same as none what-so-ever. And unfortunately, even a half-second delay makes the game unplayable while you’re capturing.
“Hold Up, I can’t Hear Anything!”
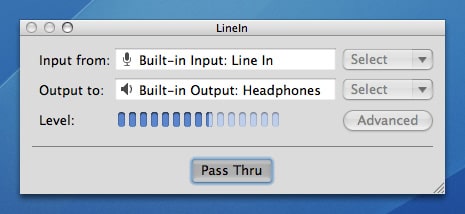
This was a rather unpleasant surprise which lead to a decent amount of frustration until I found a simple solution in the form of a freeware app. For whatever reason, you can’t actually hear the audio from a Line In source on the iMac. You can record it and play it back, but you can’t hear it live. LineIn acts as a pass-thru and sends the input source directly to the output. In most cases, you will need to set your options to…
Navigate through the Dashboard – you should hear the sound effects coming through your speakers now.
The Tricky Part
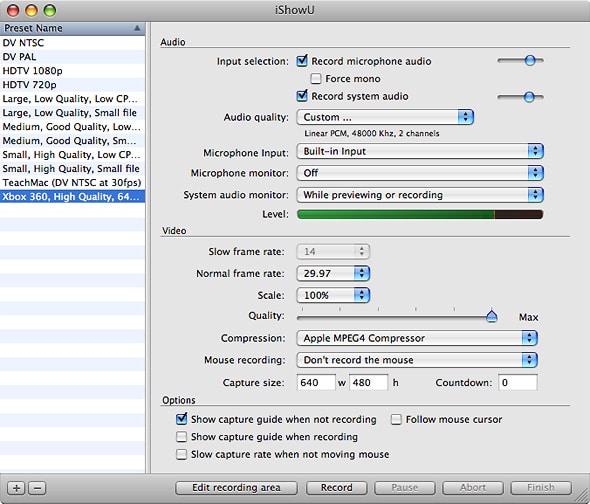
I’m pretty sure this is where most people get stuck. You get the hardware, figure out how to get the audio to come through your speakers, then try to record and realize it’s virtually unplayable. Now what? EyeTV can display the Xbox 360 in real time when it’s not recording, so taking that into consideration – why not capture the capturing software which is displaying the video? Sounds tricky, but it’s not, really. There are lots of screencasting apps that could probably do the trick. I chose iShowU, as it seemed to be the most straight-forward and decently priced of the bunch. Once iShowU is installed, create a new preset using the following settings…
Open iShowU’s preferences window and set the following…
- Options: Disable “Show video in Quicktime after recording”
- Capture: Change capture guide colour to something bright that isn’t used on your desktop or Dashboard so it’s easy to see. I use bright green.
- Storage: Set the directory where you want your videos to be saved.
The last thing we need to do before we can hit that record button is set the capture guide in iShowU. Click the “Edit recording area” button along the bottom of the app window and a 640×480 overlay should appear on screen. Carefully place it over the EyeTV window so that the guide is only around the video portion of the window – you may need to do a couple test captures to get it perfect. But breathe a sigh of relief… that’s it!
Where to go From Here
Once you have some footage captured, there are many options for editing. The new iMovie which is part of the iLife ’08 bundle is pretty stellar and the MPEG4 codec I suggested for compression in iShowU outputs a compatible file that you can simply import into iMovie.
After all of this, you may be wondering why I haven’t published a gameplay video since I switched to Mac last December. Honestly, all of this is too much work. For something as trivial as capturing video, it’s a hell of a lot of steps which took me months of trial and error to find a solid solution. I think the tediousness of this whole experience put a huge damper on something I used to love doing and I now I have little to no interest it in any longer. It’s not all bad, though. I have more time to play games now. 😉
And finally, I figured this all out a few months ago and haven’t really touched it since. There may be a few other settings that need changed in the apps, so please point them out if so and I’ll update my article.


